Effective Course Design with the ADDIE Model
When designing a course, the most important part is ensuring the course is effective and meets the learners' needs. The ADDIE model of instructional design is commonly used for course design to create instructional materials and experiences that are well-organized, engaging, and meet the course learning objectives.
When designing a course, the most important part is ensuring the course is effective and meets the learners' needs. The ADDIE model of instructional design is commonly used for course design to create instructional materials and experiences that are well-organized, engaging, and meet the course learning objectives.
The ADDIE model consists of five phases: analysis, design, development, implementation, and evaluation.
Let's review how using these five phases will help design your course!
Analysis
During the analysis phase, you identify the learners' needs and determine your course's goals. This also includes analyzing who your audience will be, the learners' learning styles, and identifying potential learning barriers.
For example, some questions you can ask yourself will be:
What do you learners need to learn?
Do your learners need to know specific skills to take your class? Are there any technical requirements necessary for the class?
How will the class be structured? Do you plan to use weekly modules or by chapter?
How will you assess your learner's performance?
How do you envision their learning environment, and how will this affect their learning?
What kind of content will you be designing to engage your learners? For example, will you use graphics, videos, text, or audio?
This phase helps you understand your course needs and how you will measure success.
One way to achieve this is to use the backward design model to identify the learners' needs and determine your course's goals. The backward design model helps you to start with the end goal in mind, which is the desired learning outcomes, and then work backward to create instructional materials and activities that will enable learners to achieve those outcomes.
You can identify what learners need to learn, what skills they need to acquire, and how you will measure their learning outcomes. You can also identify potential learning barriers and determine how to overcome them.
For example, if you are designing a course on project management, you can start with the end goal of the course, which is for learners to be able to manage projects successfully. Then, you can work backward to identify the specific skills and knowledge learners need to acquire to achieve that goal. You can also identify the best instructional materials and activities to enable learners to acquire those skills and knowledge. Lastly, you can determine how to assess the learning outcomes and address any potential obstacles preventing learning.
Design
In this phase, you will create a course outline that includes the following:
Learning objectives - for your course and modules
Course materials - content, videos, and audio or other course materials will you be designing for your course or plan to use
Assessments - assignments, quizzes, projects, or other assessment methods will you be using to measure learning outcomes.
For example, a graphic design instructor might design learning objectives that include learning how to use design software, understanding design principles, and applying them to real-life design projects. The graphic design instructor will use video tutorials to teach learners about design software and hands-on design projects to apply the concepts learned in the course. The instructor will also use quizzes to test the learners' understanding of design principles and assess whether or not they can apply what they have learned to real-life design challenges.
This phase is also where you will decide the most effective delivery methods for the course, such as face-to-face or online instruction.
Development
The development phase is where the actual course materials are created. This phase includes developing course content, creating multimedia elements such as videos or audio, and assessments. During this phase, you must ensure that you create course content accessible to all learners, regardless of their abilities.
For example, a photography instructor during this phase will create course content that consists of videos, audio, and different assessments to ensure that our learners have a well-rounded understanding of photography.
The content will also be accessible to all learners. The instructor will use closed captions in their videos to ensure that learners who are hard of hearing or deaf can still understand the content. He will also provide transcripts of the audio lectures for learners who prefer to read the content. Lastly, he will make sure that course content meets accessibility standards, which include providing alt tags for images and making sure that any external website used in the course can navigated by learners who use assistive technologies.
The photography instructor will create various materials for course content to engage the learners and cater to different learning styles. For example, he will develop interactive quizzes to test learners' knowledge of photography concepts and provide hands-on exercises to allow learners to practice their photography skills. The instructor will also create video tutorials that demonstrate specific techniques and provide examples of how to apply these techniques in real-life situations.
Implement
After developing the course, it is time to implement it. During this phase, the instructor delivers the course to the learners who take the class. Any necessary adjustments are made based on feedback from learners and instructors.
For example, a history college instructor recently developed an online course for their students. The professor implements it by giving their students access to the course materials. As the students go through the course, the professor receives feedback regarding the content, the format, and any technical difficulties they may have experienced. The professor uses this feedback to adjust the course, improve the experience, and meet the needs of the students. For example, most students need help understanding a particular module. In that case, the professor may create additional resources or provide more detailed explanations to help the students better understand the material. Similarly, if there are technical issues with the learning platform, the professor may work with the IT department to resolve them and improve the overall user experience. By making these necessary adjustments, the professor ensures that the course is effective and engaging for their students.
Evaluation
Lastly, the evaluation phase is where the success of the course is evaluated. In this phase, you want to analyze how effective the course materials were, the learner's performance in the class, and identify any areas for improvement.
For example, if you were a high school physics teacher who recently designed and implemented a new course on electromagnetism. You would collect student data and feedback during the evaluation phase to determine the course's effectiveness.
Some ways to collect feedback is to use surveys that ask questions such as:
Did you find the course materials engaging and useful?
Were the learning objectives clear and achievable?
Did the assessments accurately measure your understanding of the material?
Were you able to apply the concepts learned in the course to real-life situations?
How can the course be improved?
Based on the feedback collected during the evaluation phase, you can identify areas for improvement and make necessary changes to the course to help future students have an even better learning experience.
In conclusion, by following the ADDIE model, course designers can ensure that their courses are effective and meet the needs of learners.
ICONIC COURSE
Icons are great visual tools that can significantly enhance the design and usability of your online course.
Icons are great visual tools that can significantly enhance the design and usability of your online course. Using icons will help students quickly identify important information, navigate course content, and improve engagement. This blog post explores how to use icons in your online course effectively.
What are Icons?
Icons are symbols or pictures that are used to represent a file or application. In course design, icons can be used to support text.
Choosing the Right Icons:
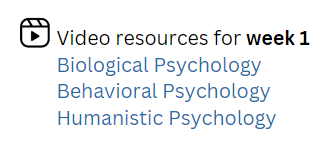
When deciding what icons to use for your course, you need to make sure you choose icons appropriate for the course content. For example, you might use a "mouse" icon to indicate links or a "video" icon to indicate video lessons.
example of a mouse icon used to show links
Keep it Simple
Use icons that are easy to understand and clear. Avoid using abstract or complicated icons that may confuse students. You want to use icons that students can easily recognize and identify.
Do use icons that are recognizable
Avoid using abstract icons
Use Consistent Icons
Ensure you use the same icon for the same type of content throughout your course. For example, use a "discussion" icon for all discussion forum links.
Do use same icon for same type of content
Make them Accessible
The icons you use should be accessible to all students, so include alt text descriptions for each icon. By doing so, screen readers can read the icon description to visually impaired students.
Using Icons in Course Navigation
Icons in your course navigation to help students quickly identify essential course elements. For example, use a "home" icon for the course homepage link or a "calendar" icon for the course schedule.
sample course navigation
Finding Icons to Use
The Noun Project is an excellent resource for finding high-quality icons to use in your course. It has over 3 million icons that you can choose from to find the perfect icon to represent any concept or topic. A community of designers creates the icons, and they are available in multiple file formats, making them easy to use in your course design.
The Noun Project also offers a subscription service that provides access to additional features such as custom icon requests and royalty-free use of the icons. Using icons from The Noun Project can help enhance your course's visual appeal and organization, making it more engaging and user-friendly for your students.
When used correctly, icons can be a powerful visual tool that can enhance the design of your course. By choosing the right icons, using them consistently, and making them accessible, you will create an engaging and user-friendly course for your students.
I CREATED LEARNING OBJECTIVES, NOW WHAT?
After designing learning objectives, what activities will help achieve the learning objectives?
After designing learning objectives, what activities will help achieve the learning objectives? Depending on the subject area, there are various types of activities that a student can complete. A well-designed course module will have assignments, opportunities for discussion, collaboration, quizzes, exams, test, labs and practices exercises.
How Course Activities Help Student Learn
Assignments – helps students to understand the concepts and ideas presented in the course.
Discussion/Collaboration – help to facilitate communication between the students.
Quizzes/Tests/Exams/Labs/Practice Exercises – these assessments help identify any knowledge deficiencies and help students focus on the areas they need to review.
Course Activities
Using Bloom’s Taxonomy, Let’s go over the different activities you can design in your course.
Activities:
Code
Concept Mapping
Ice Breaker
Practice Quiz/Exam/Test
Read
Activities:
Discussion Forums
Debate
Oral Reports
Quiz, Exam, Test
Review (Play, Movie, Audio, Book, etcetera.)
Wikis
Activities:
Art Project
Group Problem Solving/Presentations/Reports
Interview
Journaling
Laboratory Experiments
Portfolios, Presentations
Simulations
Activities:
Brainstorming
Essay
Fieldwork
Group Reports/Debugging
Reflection
Activities:
Article Critique
Case Briefs
Case Studies
Document Analysis
Literature Review
Peer Editing/Review
Activities:
Audio Recording
Blogging
Gaming
Graphic Design
Individual Project
Video Creation
Web Design
Things to Consider when Designing Course Activities
Once you decide on the learning activities for your course module, you need to consider the following:
Learning Objectives – do the activities align with your with your learning objectives? Will the students achieve the skills you outlined in your objectives?
Relevancy – are the activities relevant to your course and the learning process? Do they promote learning and have an educational purpose?
Technical requirement – do students need to use specific software or create an online account to access certain tools? Are you familiar with the technology that you want your students to use? Are your students? Do not assume students are familiar with any technology you want to use in your course.
Designing your activities is an important step in your course module design process. By creating activities that align with your objectives, you not only make sure that your students have a successful learning outcome, but you also keep your students engaged and on task.
Do you agree with the activities that I used to match with Bloom’s Taxonomy? Why or why not? What activities do you like to use in your course? Please share it below!
CREATIVE COMMONS, AN EDUCATOR’S BEST FRIEND
It might be frustrating to find a cool image or video and not know if you are authorized to use it in your course.
As educators, you often want to use external content or resources to help students learn and make your course content more exciting and appealing. You might find interesting content online, but as much as you might want to use any content you see, you need to keep in mind that you are not always legally allowed to use it.
It might be frustrating to find a cool image or video and not know if you are authorized to use it in your course. So what can you do to make sure that you are not infringing on copyright-protected items? The solution will be to use Creative Commons licenses.
What is a Creative Commons License?
Creative Commons licenses allow you to use work created by different authors. You can use text, images, audio, video, and other content as long as you give the creator the appropriate attribution. There are six types of licenses. They range from allowing you to use the content as freely as you need, to content being somewhat restrictive. The license that you will want to use most would be the Creative Commons Attribution (CC BY). This license means you can distribute, remix, modify and build upon the original work as long as the creator is given the appropriate credit.
By offering their work in Creative Commons, the creators are offered certain protection levels. All you need to do is make sure you do not infringe on those rights by giving the creators the correct attribution based on the license they offer.
Where can I Find Content Licensed under Creative Commons (CC)?
Creative Commons website – allows you to search for CC licensed content. Its search feature allows you to search across more than 300 million images!
Find OER – provides links to search for CC licensed work to use in your courses.
Wikimedia Commons – allows you to search CC licensed educational media.
Google Advance Search – by using Google Advance Search, you can put a filter to search for content that is free to use, share or modify.
Internet Archive: – American digital library that allows you to access free collections of digitized materials that include images, books, audio, movies, and more!
Flickr Commons – search for images that users have offered under CC license.
You can see how I used Creative Commons for my post Anatomy of a Learning Objective. The two images on the post were both licensed under Creative Commons.
Creative Commons helps educators create rich course content without worry. It allows educators to support each other and draw from each other in different ways to improve learner performance while at the same time enhancing their skills and understanding.
Please share in the comments below the ways you are using Creative Common in your class!


